Developer Guide
Introduction
The Voltage API enables you to integrate Lightning Network functionality into your applications. This guide will walk you through common tasks and help you get started with the API.
Start with your agent
The easiest way to get started is with the Voltage Agent Skill Pack. Install it in Claude Code, Codex, Hermes Agent, OpenCode, or another supported coding agent to get help with Voltage API integrations, payment workflows, and development-wallet setup.
If you are starting here we are assuming that you already have a team and a staging wallet setup for you. If you do not, the Wallet Setup Guide will get you ready.
Choose the correct Development wallet: Use Mutinynet Bitcoin for Bitcoin-backed implementations, including Node-backed Bitcoin and Credit-backed Bitcoin. Use Mutinynet USD for USD line-of-credit testing. Voltage Cash is the experimental stablecoin test wallet and is not currently live because the intended Tether-backed asset has not yet been minted.
Base URL
Authentication
The Voltage API uses x-api-key authentication methods for API calls:
- API Key Authentication (via x-api-key header):
Generating API Key
API keys are managed within the selected environment. Open the environment's API Keys page and select Create API Key. Give the key a descriptive name, grant only the permissions the integration needs, and add an IP allowlist when the caller uses stable source addresses.
The secret is shown once. Store it in an approved secret manager and never place it in source control, screenshots, logs, tickets, or chat.
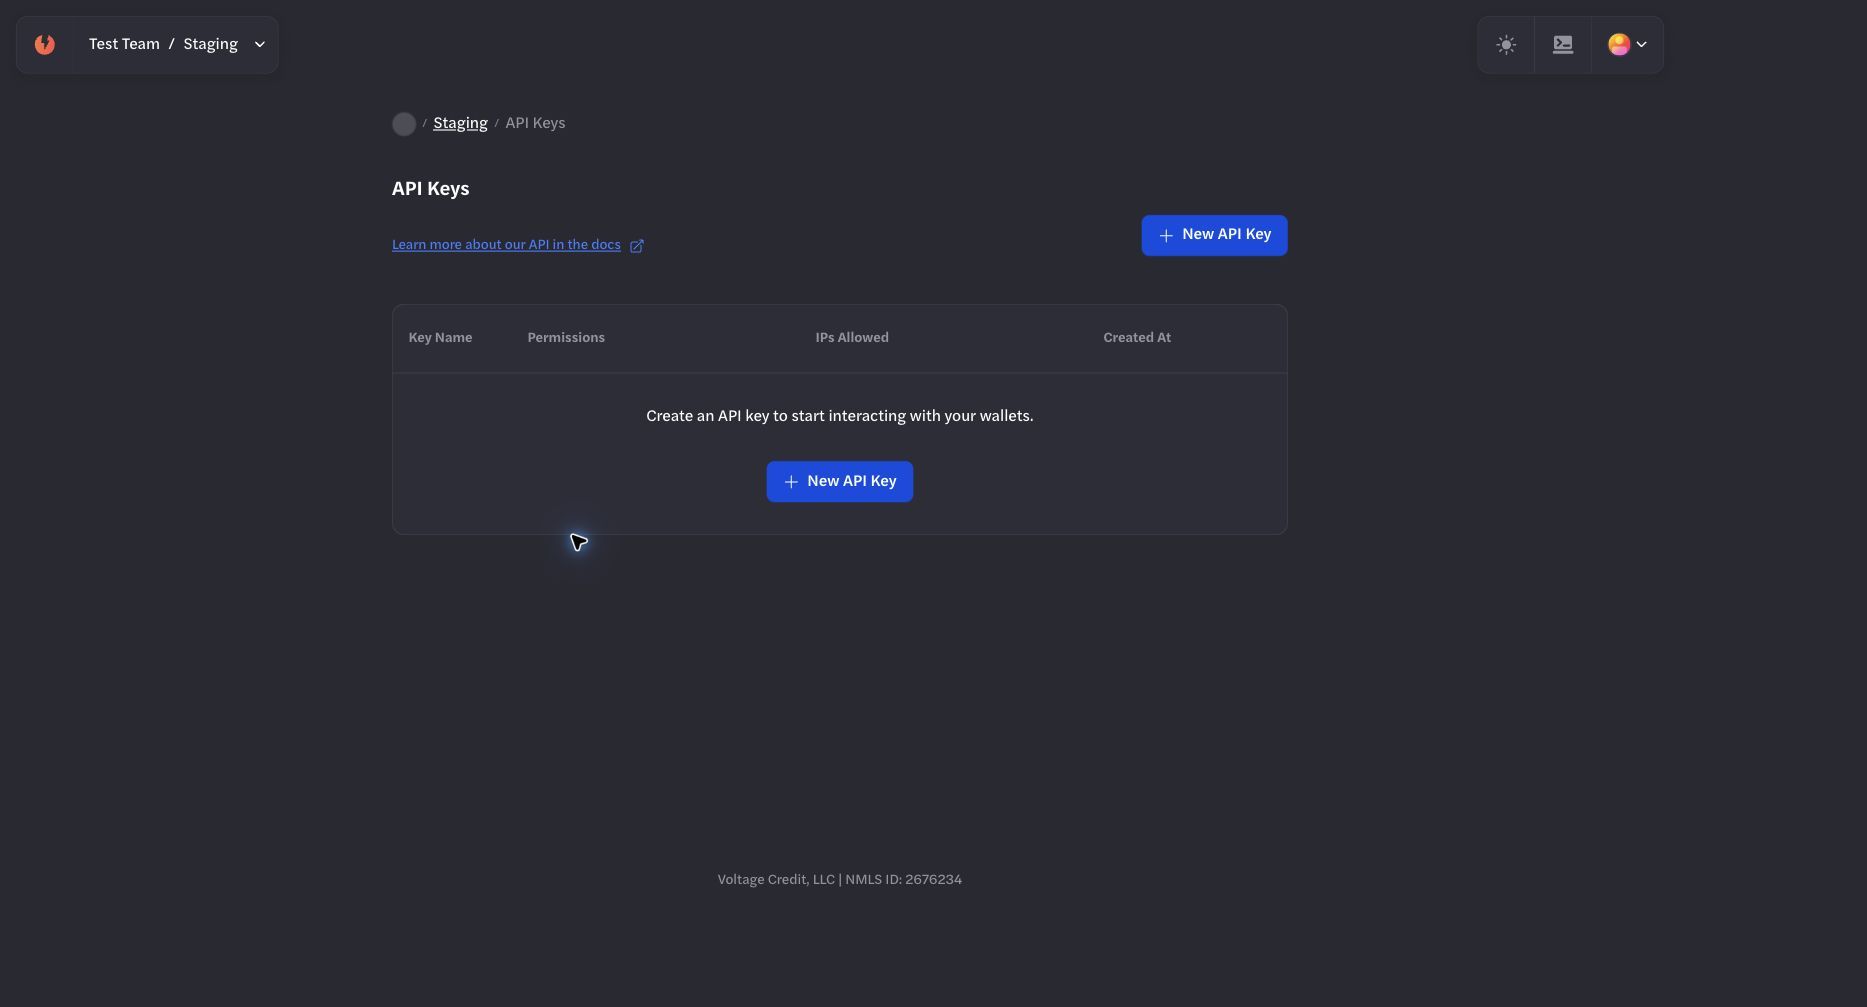
Open API Keys from the environment where the integration will run.
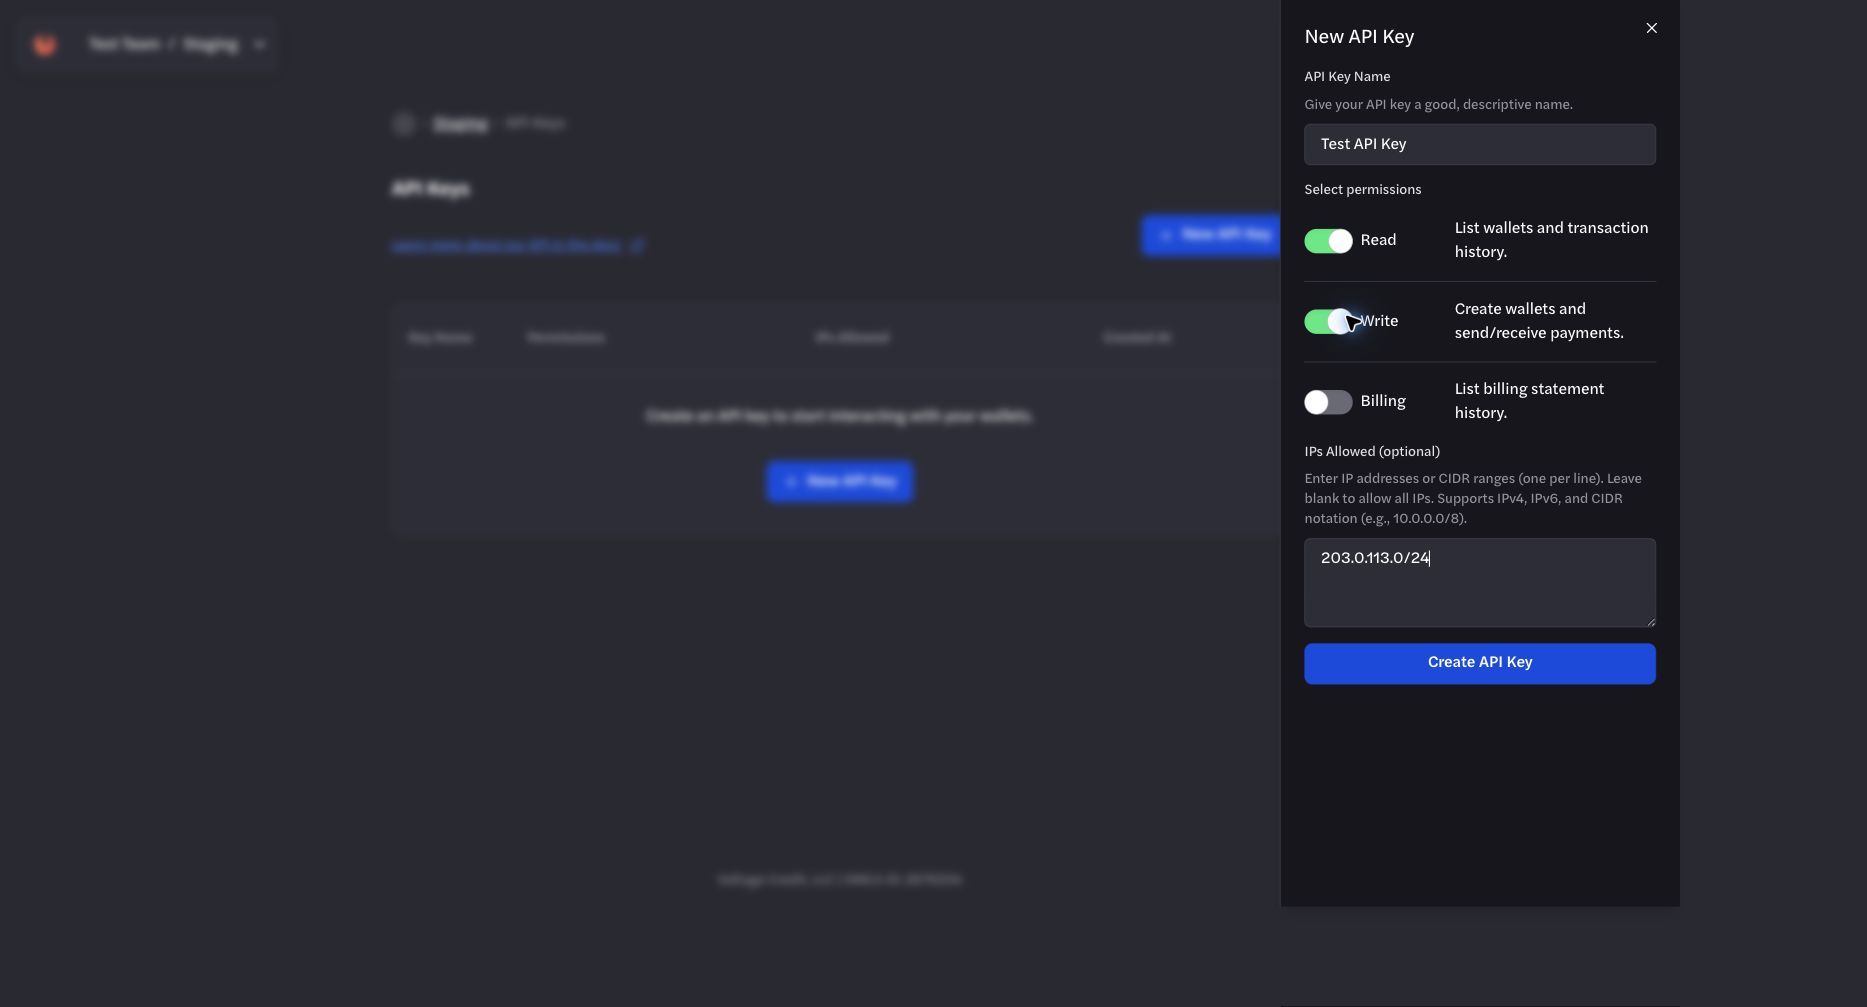
Grant only required permissions and add an IP allowlist when source addresses are stable.
Quick Start Guides
Detailed Guides Available: For comprehensive documentation on sending and receiving payments, see:
- SendingSending | Sending (USD Line of Credit)Sending (USD Line of Credit) | Sending (BTC Line of Credit)Sending (BTC Line of Credit)
- ReceivingReceiving | Receiving (USD Line of Credit)Receiving (USD Line of Credit) | Receiving (BTC Line of Credit)Receiving (BTC Line of Credit)
- Checkout (Beta)Checkout (Beta) - Hosted Lightning checkout overview, integration paths, and server-side verification boundaries.
Receiving a payment
The payment flow for receiving payments follows these steps:
1: Create a new payment (Returns 202 on success)
curl
'https://voltageapi.com/v1/organizations/{organization_id}/environments/{environment_id}/payments'
\
  --request POST \
  --header 'x-api-key: your-api-key' \
  --header 'Content-Type: application/json' \
  --data '{
    "id": "{payment_id}",
    "wallet_id": "{wallet_id}",
    "currency": "btc",
    "payment_kind": "bolt11",
    "amount": {
      "amount": 10000,
      "currency": "btc",
      "unit": "msats"
    },
    "description": "test payment"
  }'
2: After receiving 202, fetch the payment details to get the invoice
curl
'https://voltageapi.com/v1/organizations/{organization_id}/environments/{environment_id}/payments/{payment_id}'
\
  --request GET
Important: The payment creation endpoint returns a 202 status code on success, indicating the request was accepted. You must then fetch the payment details separately to get the invoice and monitor its status.
Example Payment Details Response
{
    "bip21_uri": "lightning:lntbs140n1pnag...",
    "created_at": "2025-03-14T16:08:11.692963Z",
    "currency": "btc",
    "data": {
        "amount": {
            "amount": 14000,
            "currency": "btc",
            "unit": "msats"
        },
        "memo": "test payment",
        "payment_request": "lntbs140n1pnag..."
    },
    "direction": "receive",
    "environment_id": "{environment_id}",
    "error": null,
    "id": "11ca843c-bdaa-44b6-965a-39ac550fcdf3",
    "organization_id": "{organization_id}",
    "status": "receiving",
    "type": "bolt11",
    "updated_at": "2025-03-14T16:08:13.959324Z",
    "wallet_id": "{wallet_id}"
}
Sending a Payment
The payment flow for sending payments follows these steps:
1: Initiate payment send (returns 202 on success)
curl
'https://voltageapi.com/v1/organizations/{organization_id}/environments/{environment_id}/payments'
\
  --request POST \
  --header 'x-api-key: your-api-key' \
  --header 'Content-Type: application/json' \
  --data '{
    "id": "68d00852-8dd8-4c71-94d2-91c84695da78",
    "wallet_id": "{wallet_id}",
    "currency": "btc",
    "type": "bolt11",
    "data": {
      "payment_request": "lntbs1500n1p...",
      "amount": {
        "amount": 150000,
        "currency": "btc",
        "unit": "msats"
      },
      "max_fee": {
        "amount": 1000,
        "currency": "btc",
        "unit": "msats"
      }
    }
  }'
Amount field: Optional when payment_request already contains an amount. Required when payment_request has no amount. If provided with an amount-containing invoice, values must match.
Max fee: Optional. Defaults to 1% of payment value or 1,000 msats (whichever is greater).
2: After receiving 202, fetch payment status to monitor progress
curl
'https://voltageapi.com/v1/organizations/{organization_id}/environments/{environment_id}/payments/{payment_id}'
\
  --request GET
Important: Like the receive flow, the send payment endpoint returns a 202 status code on success. You must fetch the payment details separately to monitor its status.
USD Wallets: If you're using a USD-denominated wallet, you must first obtain a quote via the Quotes API before creating a payment. See Sending (USD Line of Credit)Sending (USD Line of Credit) for details.
Payment Status Monitoring
When sending or receiving payments, you must actively monitor the payment status by fetching the payment details. The status field will progress through these states:
- For sent payments:
- Initial: sending
- Final: completed or failed
- For received payments:
- Initial: receiving
- Final: completed or failed
Best practices for monitoring:
- Poll the payment status endpoint every few seconds
- Implement appropriate timeout logic
- Handle both success and error states
- Consider implementing webhook notifications for status changes
Example of checking payment status:
async function monitorPayment(paymentId) {
  while (true) {
    const response = await fetchPaymentStatus(paymentId);

    if (response.status === 'completed') {
      return response; // Payment successful
    }
    if (response.status === 'failed') {
      throw new Error(response.error || 'Payment failed');
    }

    // Wait before checking again
    await new Promise(resolve => setTimeout(resolve, 2000));
  }
}
Wallet Balance Management
Regularly check wallet balances to ensure sufficient funds:
curl
'https://voltageapi.com/v1/organizations/{organization_id}/wallets/{wallet_id}'
Payment History
Track payment history and events:
curl
'https://voltageapi.com/v1/organizations/{organization_id}/environments/{environment_id}/payments/{payment_id}/history'
Creating A Staging Wallet through the API:
Before creating another staging wallet through the API, confirm that the staging environment and its current funding resources already exist. Create the API key in that environment and retrieve the current organization, environment, and funding identifiers from supported API or product surfaces.
Do not infer line-of-credit limits or identifiers from a fixed dashboard location.
The example below uses the Mutinynet network. Before using it, create or select Mutinynet Bitcoin for Node-backed or Credit-backed Bitcoin testing, or Mutinynet USD for USD line-of-credit testing. Voltage Cash is not used for either workflow.
curl 'https://voltageapi.com/v1/organizations/{organization_id}/wallets' \
  --request POST \
  --header 'content-type: application/json' \
  --header 'x-api-key: YOUR_STAGING_API_KEY' \
  --data '{
    "environment_id": "{environment_id}",
    "id": "{client_generated_wallet_id}",
    "line_of_credit_id": "{line_of_credit_id}",
    "limit": 100000000,
    "metadata": {"tag": "testing wallet"},
    "name": "Staging Wallet",
    "network": "mutinynet"
  }'
Metadata Support
Add custom metadata to wallets for better organization:
curl 'https://voltageapi.com/v1/organizations/{organization_id}/wallets' \
  --request POST \
  --data '{
    "name": "Customer Wallet",
    "metadata": {
      "customer_id": "cust_123",
      "purpose": "subscription_payments"
    }
    // ... other wallet creation fields
  }'
Error Handling
The API uses standard HTTP status codes:
- 200: Success
- 201: Resource created
- 202: Successfully requested a new payment be created
- 400: Bad request
- 403: Authentication/authorization error
- 404: Resource not found
- 500: Server error
Always check the response status and handle errors appropriately.
Support and Resources
For additional support:
Remember to always use appropriate error handling and logging in your integration to ensure reliable operation of your Lightning Network payments.